With the rise of affordable music gear and powerful software, recording vocals at home has become more accessible than ever. Independent musicians, content creators, and hobbyists no longer need to book expensive studios to achieve high-quality recordings.
Instead, with the right setup and a little technical knowledge, you can produce professional-sounding results right from your bedroom or home studio.
While technology has made the process easier, achieving great sound still requires more than just plugging in a microphone.
Factors such as equipment choice, room acoustics, microphone handling, and software selection all play crucial roles. Understanding these elements will help you get cleaner, richer, and more polished recordings.
In this guide, we’ll cover the essential equipment you need, tips for improving acoustics, proper microphone techniques, recommended recording software, and the most common mistakes to avoid when recording vocals at home.
Recording Vocals At Home: Must-Have Equipment For Beginners
The first step toward successful recording vocals at home is having the right equipment. While it’s possible to start with minimal gear, certain tools will dramatically improve the quality of your recordings.
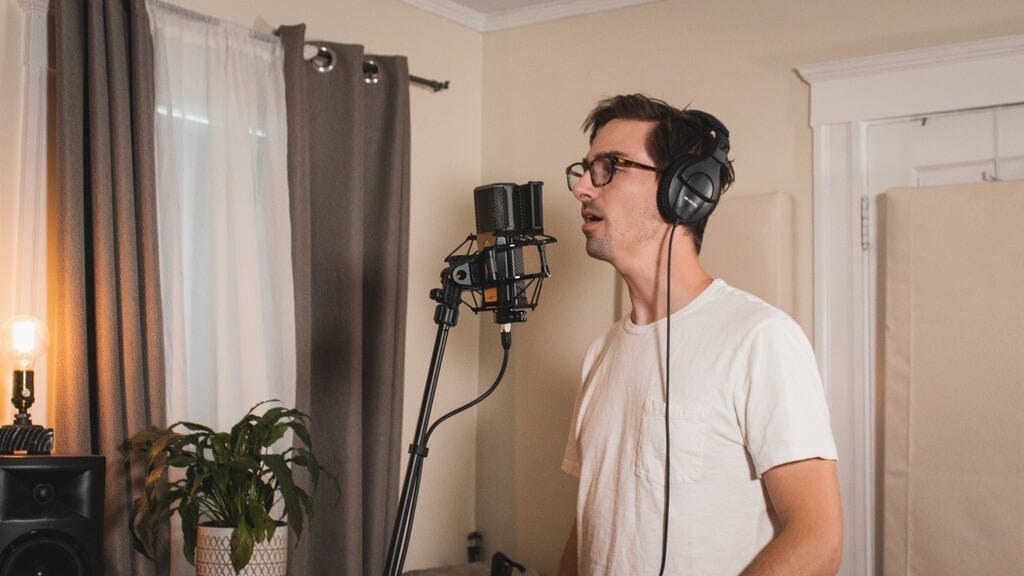
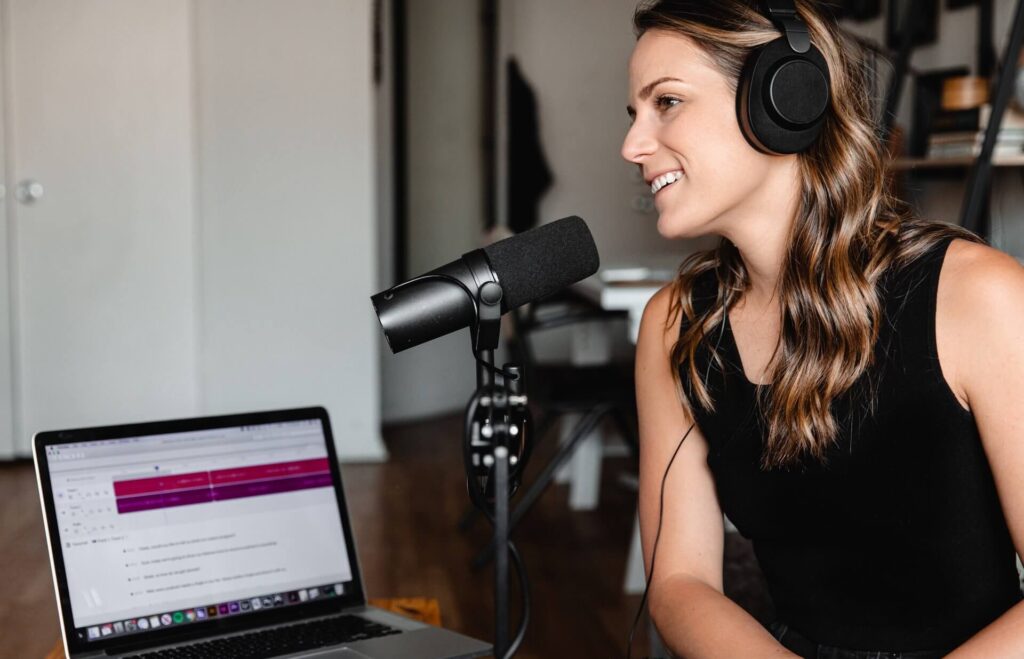
Microphone: A good condenser microphone is the heart of vocal recording. It captures a wide frequency range and subtle vocal nuances. USB microphones are convenient for beginners, but XLR condenser mics with an audio interface provide superior sound quality.
Audio Interface: This device converts your microphone’s analog signal into digital data. A reliable interface with low latency ensures that your vocals sound clear and professional. Popular beginner-friendly models include the Focusrite Scarlett and PreSonus AudioBox.
Headphones: Closed-back studio headphones are essential to prevent sound from bleeding into the microphone. They allow you to monitor your performance in real time.
Studio Monitors: While not mandatory for beginners, studio monitors help during the mixing stage by providing an accurate representation of your recording.
Pop Filter: A small but critical accessory that reduces plosive sounds (like “p” and “b”) from distorting the recording.
Mic Stand: Keeps your microphone stable and allows you to maintain a consistent recording position.
Even with budget-friendly gear, you can achieve excellent results. The key is to learn how to use your tools effectively to make the most of your recording vocals at home experience.
Improving Room Acoustics For Clearer Sound Quality
No matter how advanced your microphone is, poor room acoustics can ruin your recording.
Hard surfaces create echoes and reflections that make vocals sound muddy or boxy. Fortunately, improving your space for recording vocals at home doesn’t have to be expensive.
Curtains and Blankets: Hanging thick curtains or blankets on windows and walls helps absorb reflections.
Rugs and Carpets: Covering bare floors prevents sound from bouncing around the room.
Bookshelves: Filled with books, they act as natural diffusers that break up sound waves.
DIY Vocal Booth: Using a closet filled with clothes can create a surprisingly effective recording space.
For more professional results, you can invest in acoustic panels, bass traps, and diffusers. However, even simple steps like recording in a smaller room with plenty of soft furnishings can significantly improve clarity.
Remember, recording vocals at home is all about minimizing background noise and controlling reflections. A well-treated space ensures that your microphone captures your voice as cleanly and naturally as possible.
Recording Vocals At Home: Microphone Techniques To Master
Having the right microphone is only half the battle—knowing how to use it is equally important. Proper mic technique can drastically affect the outcome of recording vocals at home.
Distance Control: Keep about 6–8 inches between your mouth and the microphone. Too close and you’ll get distortion; too far and your voice will sound thin.
Angle Positioning: Position the microphone slightly off-axis to reduce plosive sounds without sacrificing clarity.
Pop Filter Usage: Always use a pop filter to eliminate harsh bursts of air.
Dynamic Performance: Move closer to the mic during soft passages and slightly back away during loud peaks. This creates a natural balance.
Breath Control: Be mindful of heavy breathing noises. Adjust your posture and mic placement to reduce them.
Practicing good microphone technique ensures that your recordings sound balanced and professional. Over time, you’ll develop a natural feel for handling different vocal dynamics while recording vocals at home.
Recommended Software And Plugins For Vocal Recording
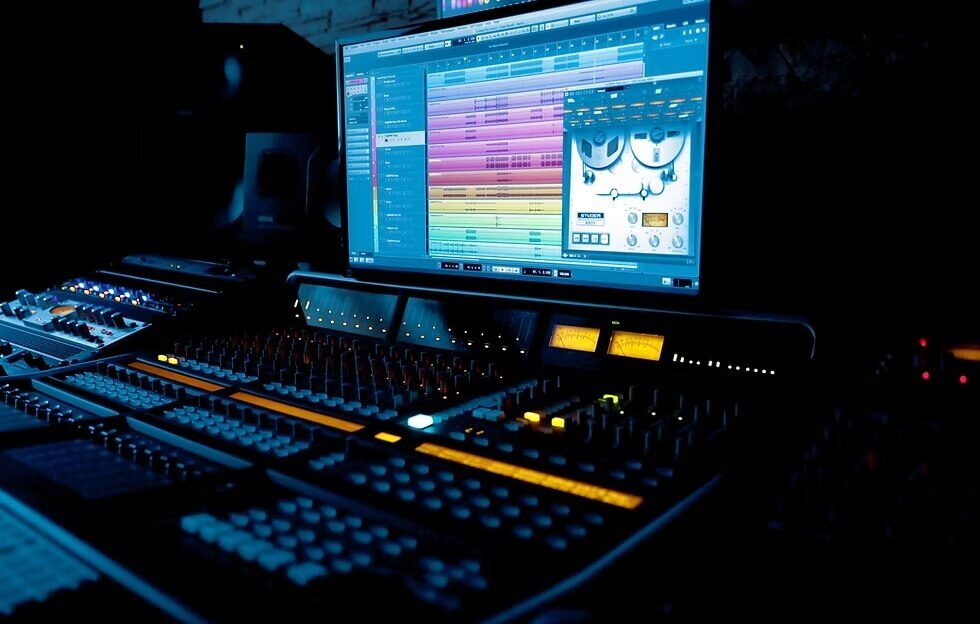
Software is where the magic happens. A Digital Audio Workstation (DAW) allows you to record, edit, and process your vocals. Choosing the right DAW is essential for success in recording vocals at home.
Pro Tools: Industry standard, powerful but more expensive.
Logic Pro X: Popular among Mac users for its intuitive design and vast sound library.
Cubase: Known for precise editing tools and MIDI integration.
Ableton Live: Great for both live performance and studio work, especially for electronic music producers.
Reaper: Budget-friendly and highly customizable for home studios.
Plugins are equally important for polishing your vocals. Essential ones include:
EQ (Equalizer): Shapes the tonal balance of your voice.
Compressor: Controls dynamic range, keeping your vocals consistent.
Reverb & Delay: Adds space and depth to your sound.
Auto-Tune or Melodyne: Corrects pitch issues when necessary.
With the right software and plugins, recording vocals at home becomes not just convenient but also highly versatile, giving you control over every aspect of your sound.
Recording Vocals At Home: Common Mistakes To Avoid
Even with good gear and preparation, beginners often make mistakes when recording vocals at home. Knowing what to avoid will save you time and frustration.
Ignoring Acoustics: A high-end microphone won’t fix a bad-sounding room.
Improper Gain Staging: Setting input levels too high causes distortion, while too low introduces noise. Aim for consistent levels around -12dB to -6dB.
Overusing Effects: Too much reverb, compression, or auto-tune can make vocals sound unnatural.
Skipping Warm-Ups: Singing without warming up leads to inconsistent tone and vocal strain.
Recording With Speakers On: Always use headphones to prevent playback from bleeding into the mic.
By avoiding these pitfalls, you’ll ensure that your recording vocals at home sessions are productive and result in cleaner, more polished tracks.
See you in the next post,
Anil UZUN